Published on: Maharjan-Tech
Author: MAHARJAN | System Engineer
Category: Windows Server / File Services / IT Infrastructure
Estimated Reading Time: 8 mins
🔰 Introduction
In many organizations—banks, insurances, hospitals, colleges, and other companies—a centralized and secure file-sharing system is critical. With Windows Server 2025, Microsoft has improved performance, security, and management tools that are ideal for modern file server environments.
This blog walks you through step-by-step deployment and best practices to set up a File Server tailored for country-based infrastructure, considering network conditions, security compliance, and administrative simplicity.
🧱 Why a File Server?
A File Server allows central management of:
- Department-wise data
- Permission-based file sharing
- Secure backup & audit logs
- Shadow copy for accidental deletions
- Storage quotas and file screening
🔧 Step-by-Step Deployment Guide
✅ Step 1: Prepare the Server Environment
- OS: Install Windows Server 2025
- IP: Assign a Static IP
- Domain: Join to your Active Directory Domain (e.g.,
maharjan.local) - Drive Partition: Use a dedicated partition (e.g.,
D:orE:) for file shares - Update: Install all latest patches via Windows Update
✅ Step 2: Install File Server Role
- Open Server Manager
- Click Add Roles and Features
- Select:
- File and iSCSI Services → Check
File Server - (Optional)
FSRM,DFS
- File and iSCSI Services → Check
- Complete installation and reboot if required
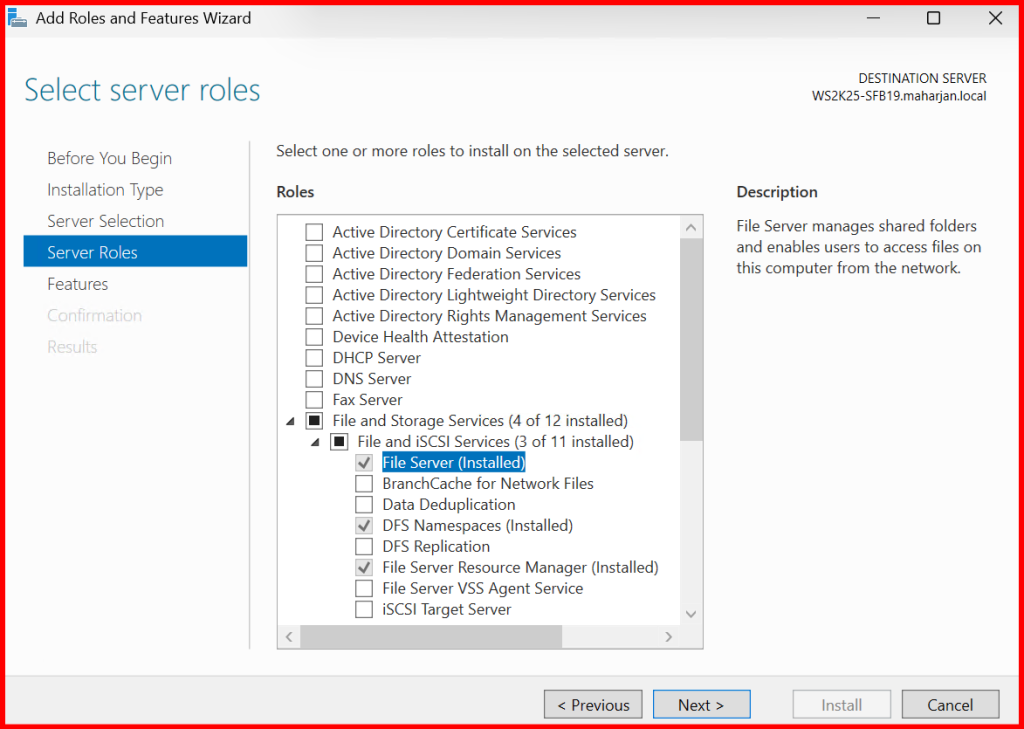
| Roles | Descriptions |
| File Server | File server manages shared folders and enables users to access files on this computer from the network. |
| File Server Resource Manager (FSRM) | FSRM helps you manage and understand the files and folders on a file server by scheduling file management tasks and storage reports, classifying files and folders, configuring folder quotas, and defining file screening policies. |
| DFS Namespaces | It enables you to group shared folders located on different servers into one or more logically structured namespaces. |
✅ Step 3: Folder Structure & Sharing
File Server Folder Design Structure
E:\FILESERVER-CENTRALIZED-DATA\
├─ BRANCHES\ → [KATHMANDU-BRANCH, BHAKTAPUR-BRANCH, BUTWAL-BRANCH, POKHARA-BRANCH, LUMBINI-BRANCH]
├─ HEAD-OFFICES\DEPARTMENTS\ → [ADMIN, FINANCE, HR, IT, PROCUREMENT, MARKETING, LEGAL]
└─ PUBLIC-SHARE-HUBS\ → [Educational-Videos, Notices-2025, Reports]
In the above design structure, the Head-Offices and Branches folders contain multiple subfolders, each requiring specific access and permissions for their respective groups (i.e., branches or departments). However, the Public-Share-Hubs folder should be accessible to all users with read-only permission.
Steps to Share:
- Right-click the folder → Properties → Sharing
- Click Advanced Sharing
- Share name:
Finance,IT, etc. - Permissions:
- Remove
Everyone - Add domain security groups (e.g.,
Finance-Groups,IT-Groups)
- Remove
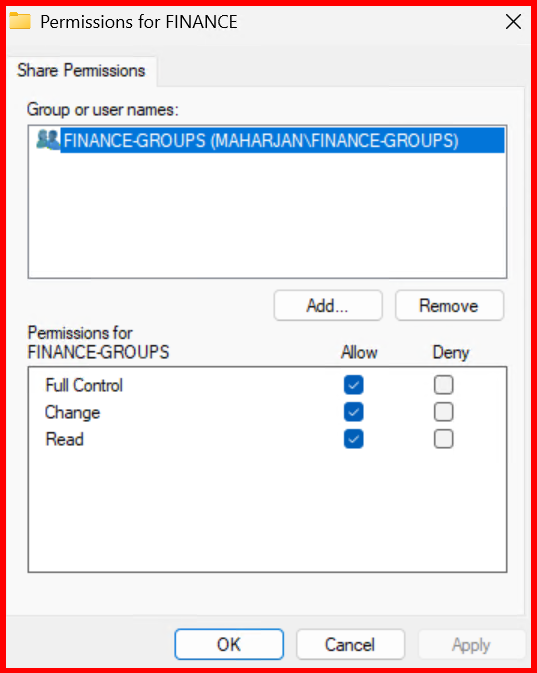
NTFS Permissions (Security Tab):
Finance-Groups→ ModifyDomain Admins→ Full Control- Remove
Authenticated Usersif not needed
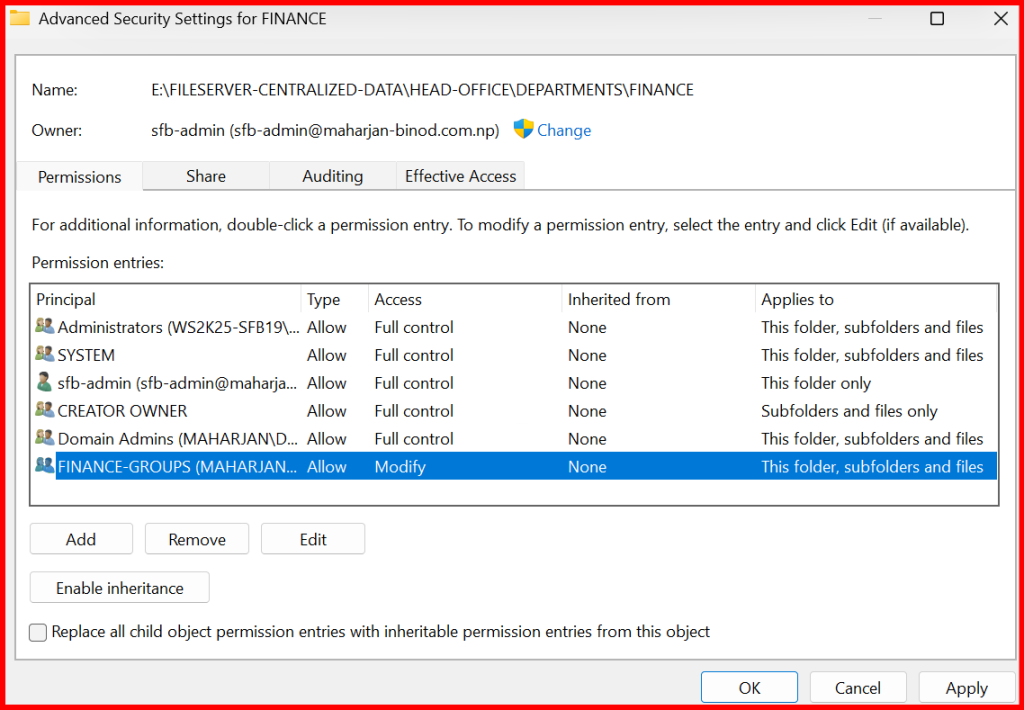
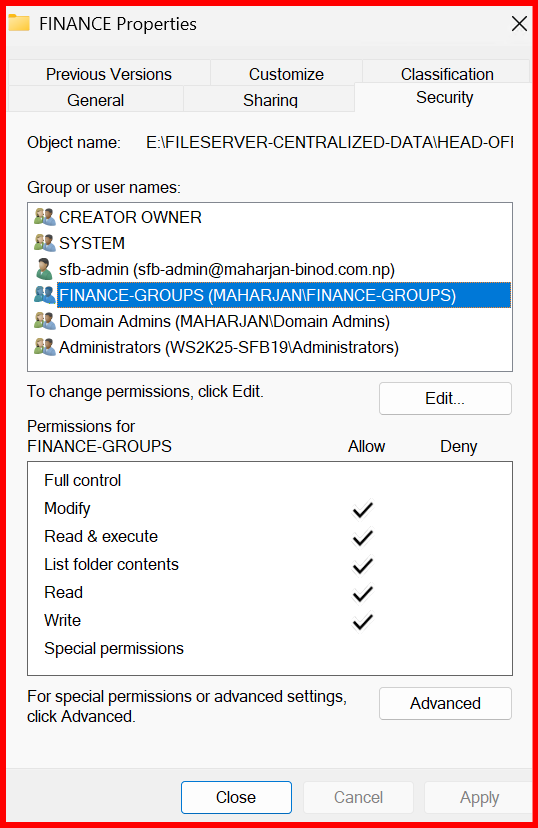
Note: For each Department and Branch folder, configure sharing access by adding the respective security groups. Assign NTFS permissions according to each group’s access requirements. Additionally, include a dedicated admin group with full privileges to manage and maintain the folders.
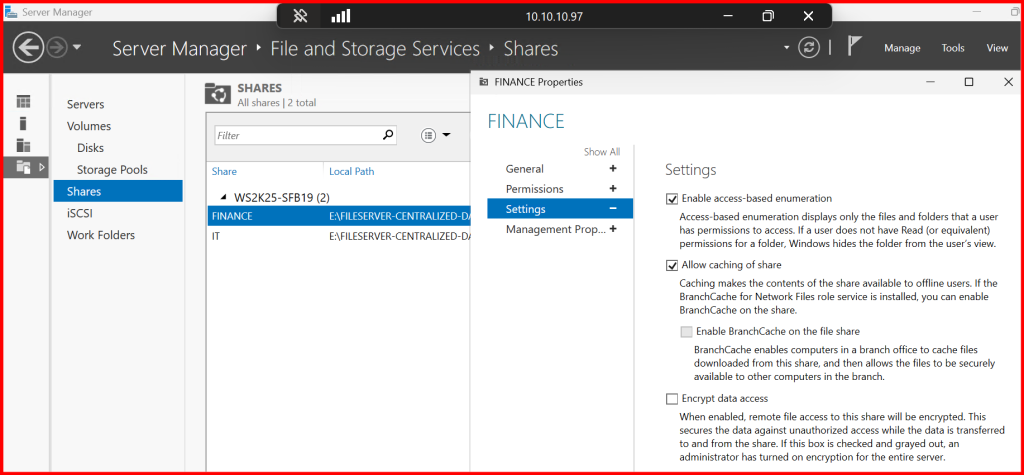
✅ Step 4: Enable Access-Based Enumeration (ABE)
Hide folders users can’t access:
- Open Server Manager → File and Storage Services → Shares
- Edit the share → Go to Settings
- Tick
Enable access-based enumeration
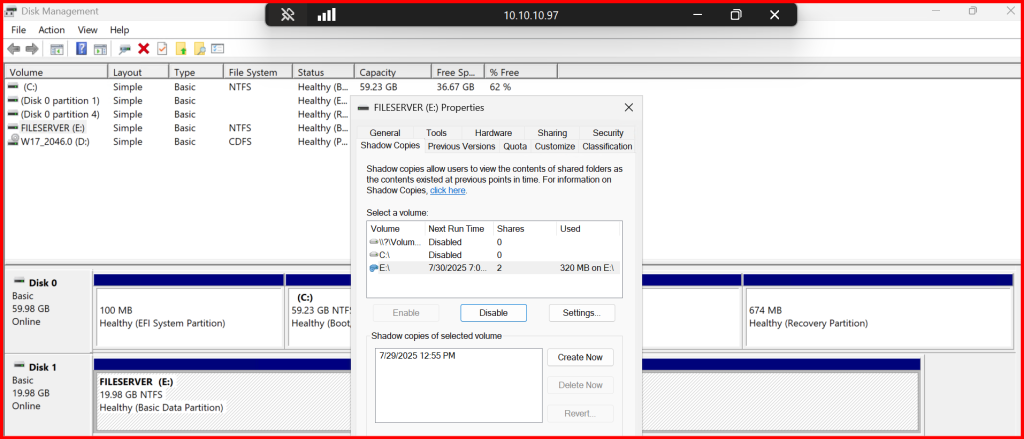
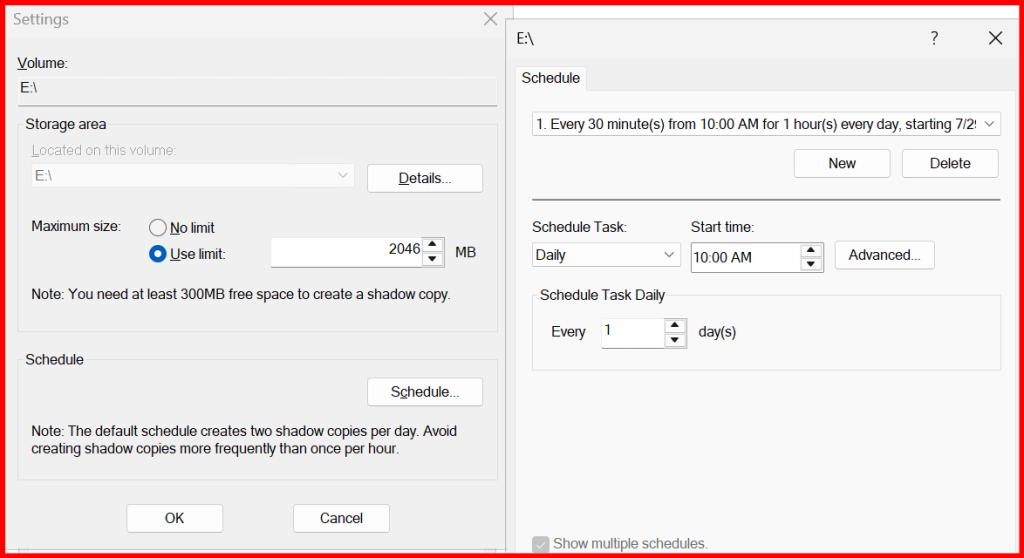
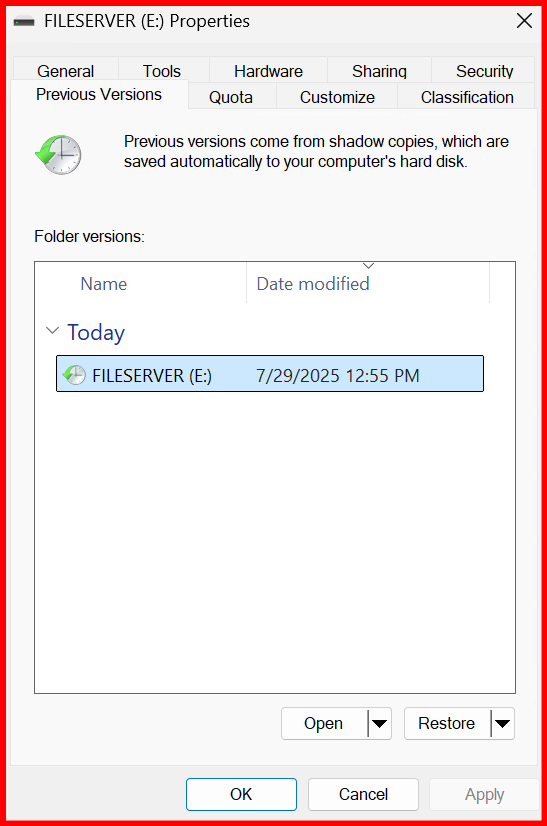
✅ Step 5: Enable Shadow Copies (Previous Versions)
- Right-click on
E:→ Configure Shadow Copies - Select the volume → Enable
- Set schedule: e.g., every 1 hour
- Inform users they can right-click > Previous Versions to restore files
✅ This helps avoid unnecessary ticket requests and restores files deleted mistakenly.
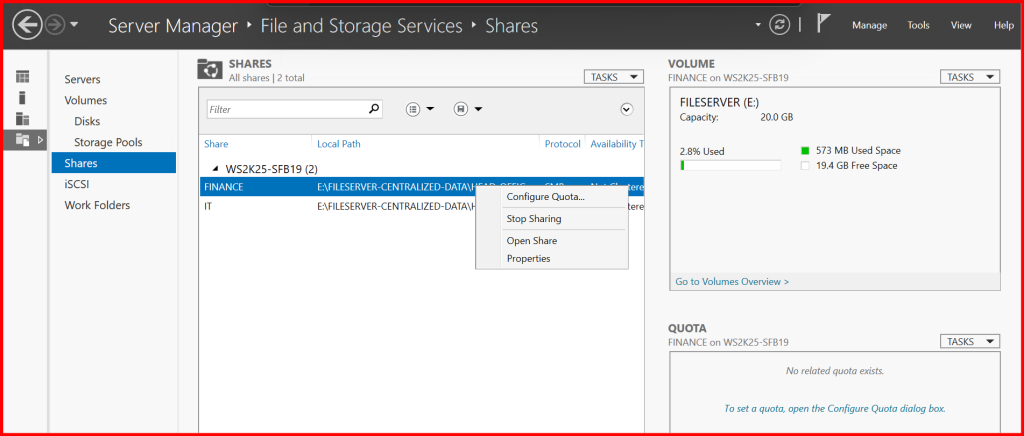
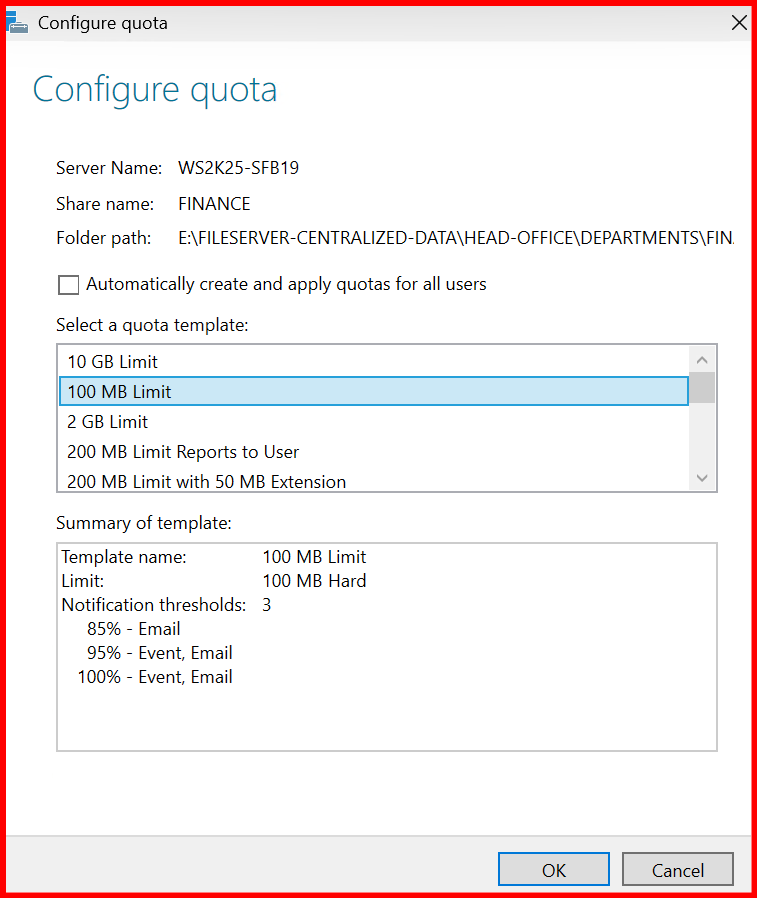
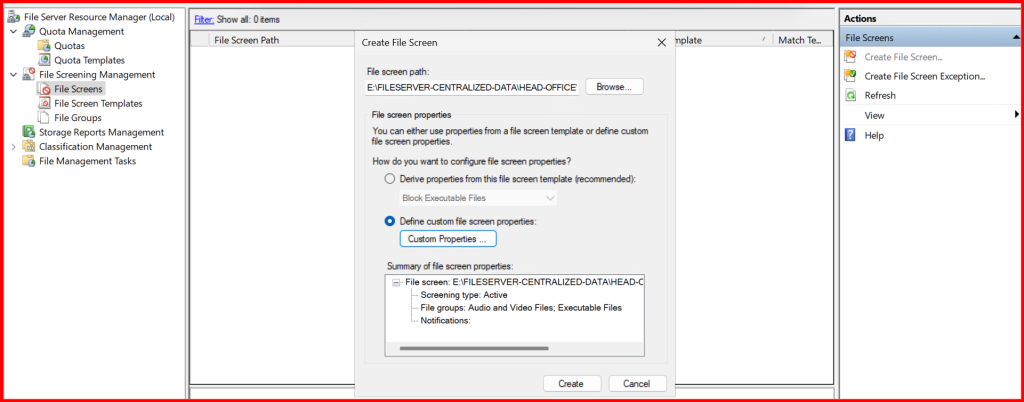
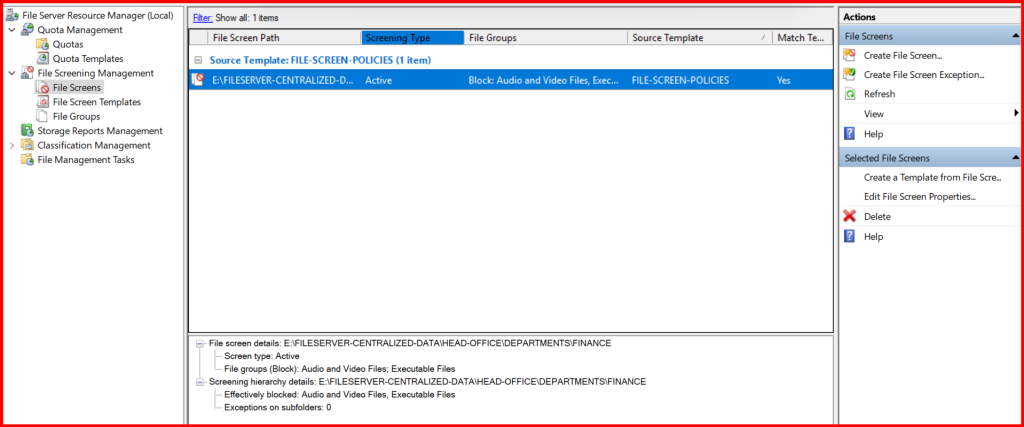
✅ Step 6: Implement Quotas and File Screening (FSRM)
Install File Server Resource Manager (FSRM) for:
- Quotas (e.g., FINANCE share max 100MB)
- Blocking files (e.g.,
.exe,.mp3,.torrent)
Steps:
- Open FSRM Console
- Create Quota → Select path (e.g.,
E:\FILESERVER-CENTRALIZED-DATA\HEAD-OFFICE\DEPARTMENTS\FINANCE) - Create File Screen → Block unwanted file types
📌 Tip: Especially useful for schools and finance departments in Nepal to maintain storage hygiene.
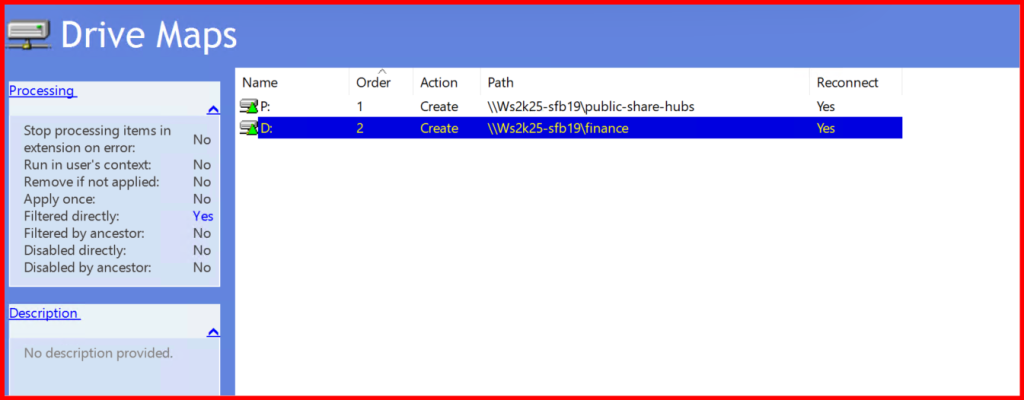
✅ Step 7: Map Network Drives via GPO
For user drive mapping:
- Open Group Policy Management
- Create a GPO:
DEPARTMENT-MAPDRIVE-GPO - Edit GPO:
User Configuration→Preferences→Drive Maps- Location:
\\\Ws2k25-sfb19\finance - Drive Letter:
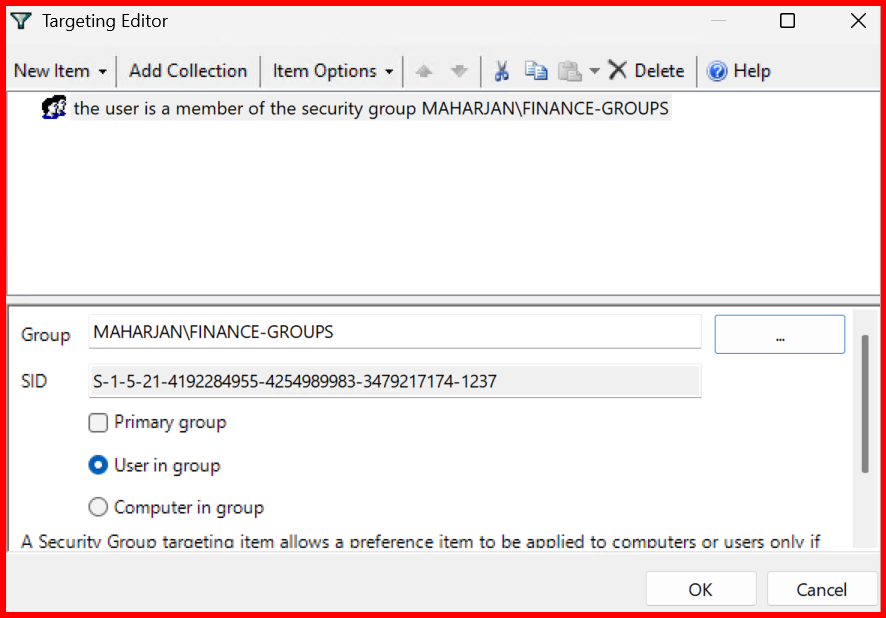
D: - Use Item-Level Targeting → Target
HRTeamgroup
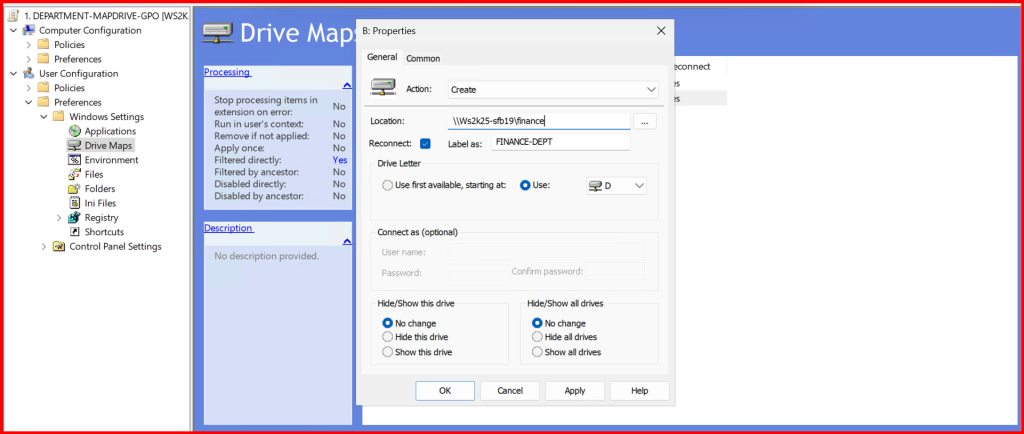
Note: I did not get drive mapped of Finance dept. due to conflict of drive letter. So, i changed to another letter and try again.
✅ Step 8: Test the GPO
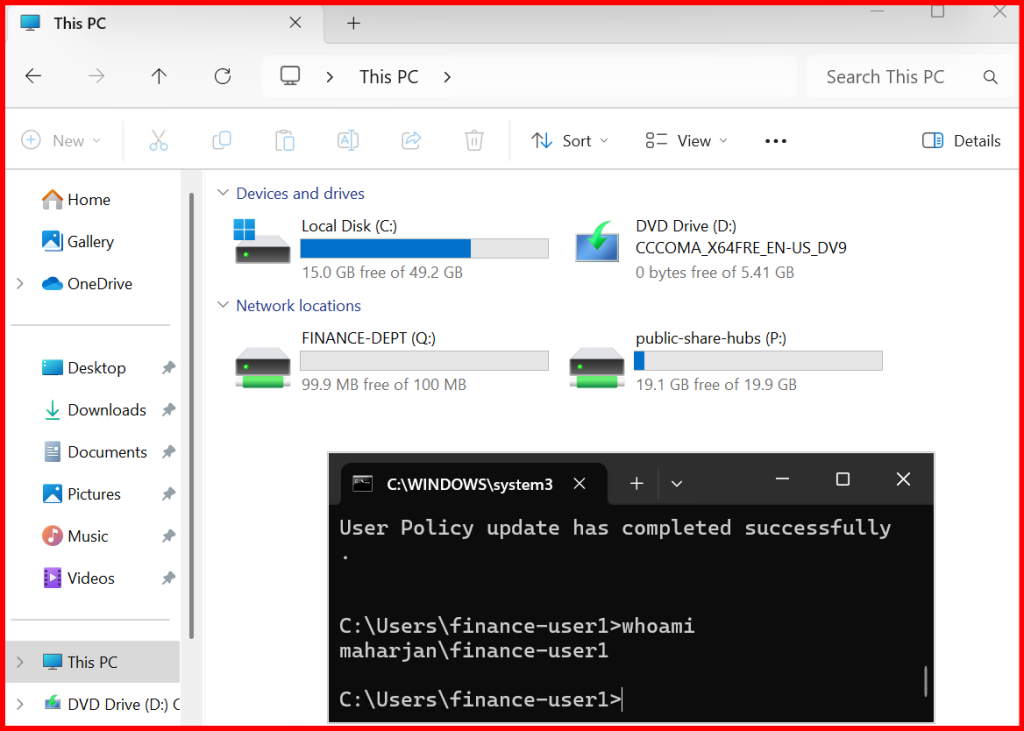
Note: The drive mapping policy has been successfully applied. It is observed that the Finance department’s mapped drive displays a total size of 100 MB, reflecting the quota limit previously assigned. In contrast, the Public-Share-Hubs mapped drive shows the full 20 GB, which corresponds to the total volume size since no quota has been configured for that folder.
Also checked: The features for Previous Versions, File Screening, and Access-Based Enumeration (ABE) have been successfully reviewed and verified. These features are functioning as expected, enhancing data protection, storage control, and user-specific folder visibility.
🏁 Conclusion
With Windows Server 2025, setting up a highly available and secure File Server for Nepalese organizations is easier than ever. By combining core features like ABE, Shadow Copies, FSRM, and GPO mapping, you can ensure streamlined collaboration with data control and user accountability.