
As a system administrator, I know how critical Active Directory (AD) is to the health and security of any Windows-based network. If AD goes down or gets corrupted, it can paralyze user access, authentication, and a whole lot more. That’s why understanding how to back up and recover Active Directory is an essential skill—even for beginners.
In this guide, I’ll Walk you through the basics of AD backup and recovery, using plain language and practical steps that anyone can follow.
💾 What Should I Backup?
When backing up AD, I always make sure to include:
- System State: This includes the AD database (NTDS.dit), SYSVOL, registry, boot files, and more.
- Critical Volumes: If you’re using third-party tools, ensure the volumes that host AD-related files are included.
But, for accidentally deleted objects like users, etc. I make sure enable AD Recycle Bin as a first level restore plan.
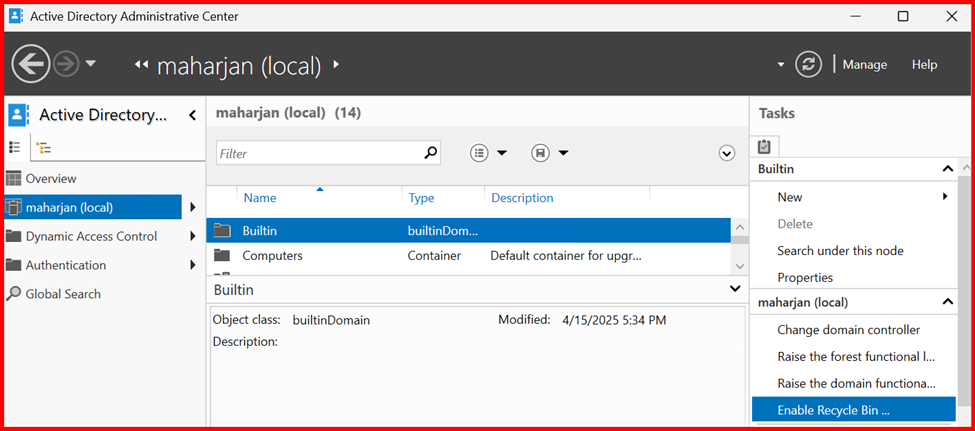
Level1: How to enable AD Recycle Bin?
Enabling the Active Directory Recycle Bin allows you to restore accidentally deleted users, groups, OUs, etc. without needing to restore from backup.
🖥️ Method: Enable via GUI (Active Directory Administrative Center)
- Open Active Directory Administrative Center (ADAC)
- In the left pane, click your domain
- In the right pane, under Tasks, click “Enable Recycle Bin”
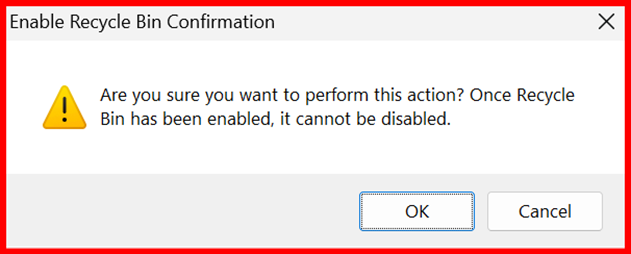
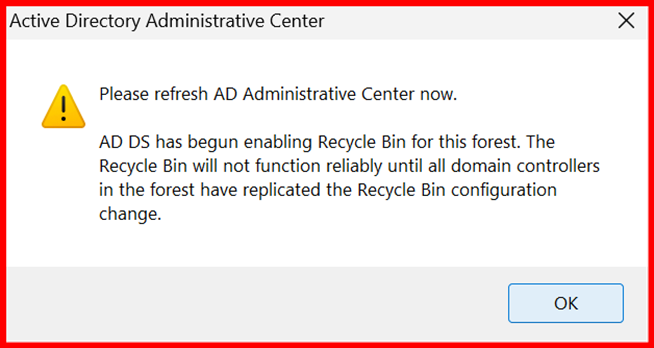
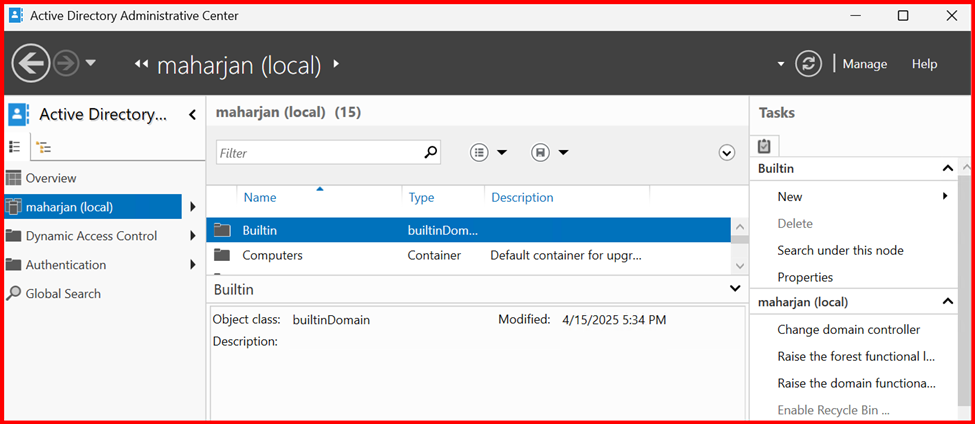
- Confirm the prompt — the Recycle Bin will be enabled.
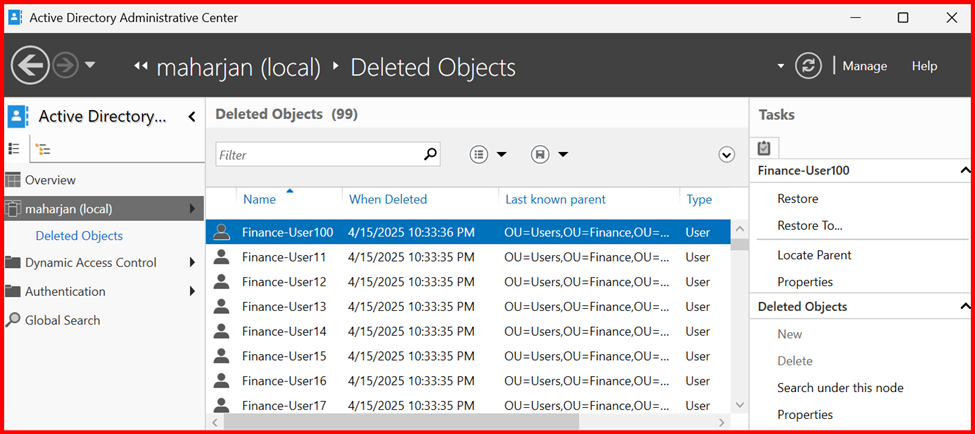
Restore deleted objects from the Recycle Bin?
If any objects accidently or intentionally deleted from AD Console, I can restore from Recycle Bin Deleted Object container.
LEVEL2: Using Windows Server Backup
What Windows Server Backups & How?
In the event of corruption or failure affecting Windows Server services, components, files, or folders, Windows Server Backup provides essential protection. It offers two key backup options: Full Backup (also known as Bare-Metal Recovery) and System State Backup.
A System State Backup captures all critical system components required to restore Active Directory and other important configurations, ensuring recovery in case of a system failure.
✅ System State Backup Includes:
| Component | Description |
| 🧠 Active Directory Database (NTDS.dit) | Core of AD DS — user accounts, groups, OUs, etc. (Domain Controllers only) |
| 📂 SYSVOL | Contains Group Policy templates and login scripts |
| 📒 Registry | System-wide settings and configurations |
| 🔌 COM+ Class Registration Database | Required for system services that use COM+ |
| 🗃️ Boot Files | Boot.ini, BCD, and other files required to boot the OS |
| 🧾 Certificate Services Database | (If AD CS role is installed) Contains CA configuration and certificates |
| 🗂️ Cluster Service Information | (If Failover Clustering is enabled) |
| 🌐 DNS Zones | If DNS is integrated with AD, zones are backed up with AD |
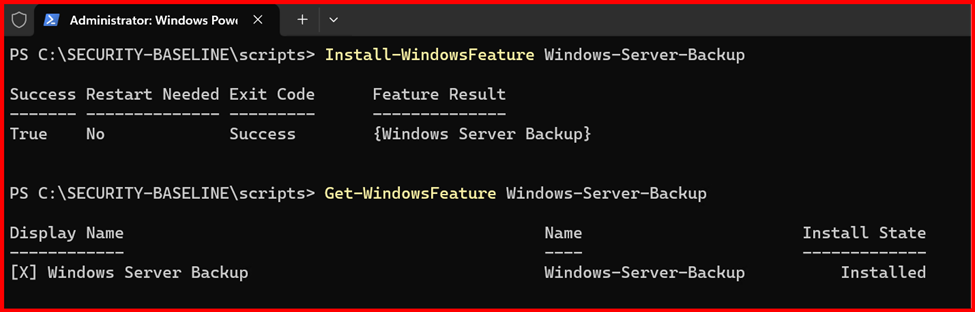
Step1: Install Windows Server Backup
Open Server Manager > Manage > Add Roles and Features
- Under Features, check Windows Server Backup and install it.
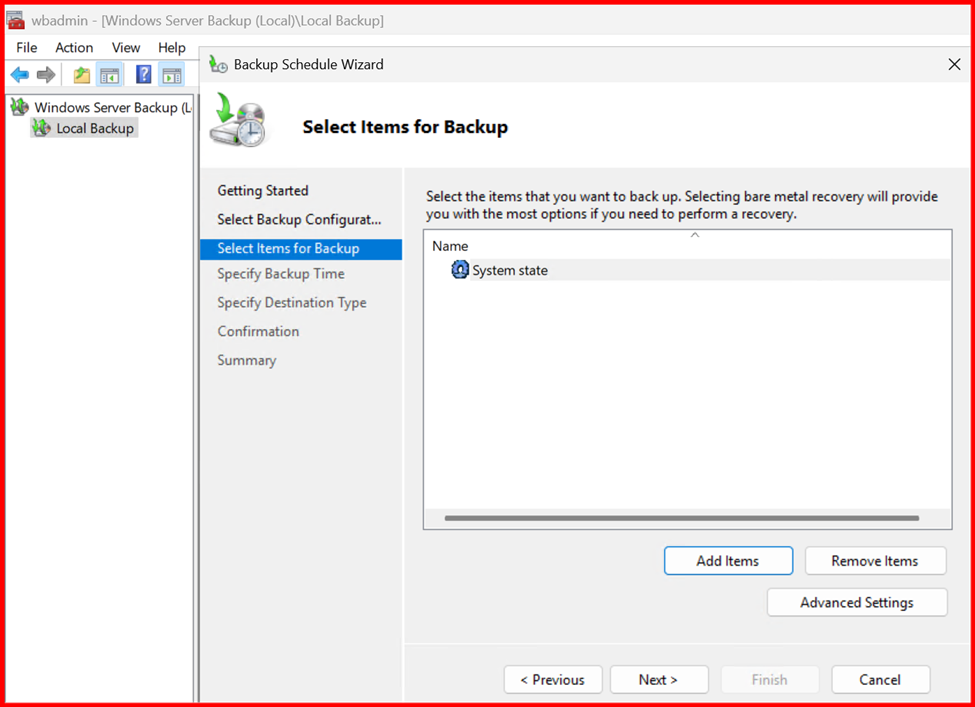
Step2: Create a Backup Schedule
Open Windows Server Backup
- Select Local Backup > Backup Schedule
- Choose Custom, then select System State
- Choose a backup destination (not the system drive)
- Set a daily schedule


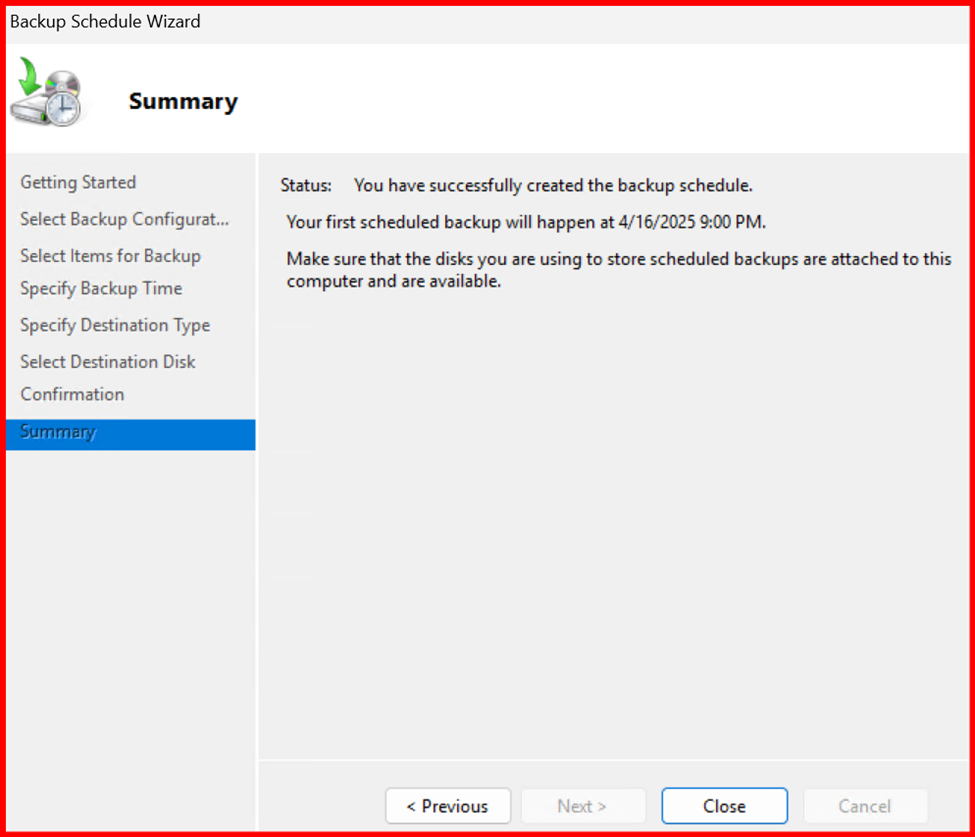
At schedule date and time, Backup completed.
🔄 How to Restore Active Directory
🧯 Authoritative vs Non-Authoritative Restore
- Non-Authoritative Restore: This brings AD back to the last backup state, then updates it using other domain controllers. Use this when the rest of your network is fine.
- Authoritative Restore: This tells your restored DC that its data should overwrite others. Use this for restoring deleted users, OUs, or GPOs.
🔙 Non-Authoritative Restore Steps
- Boot into Directory Services Restore Mode (DSRM):
Option 1: Use System Configuration (msconfig)
- Open Run → type msconfig
- Go to Boot tab → Check Safe boot > Active Directory repair
- Click OK → Restart
Option 2: Use PowerShell
bcdedit /set safeboot dsrepair
shutdown /r /t 0
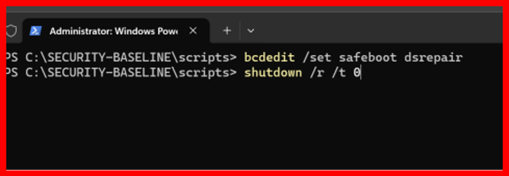
✅ The server will reboot into DSRM.
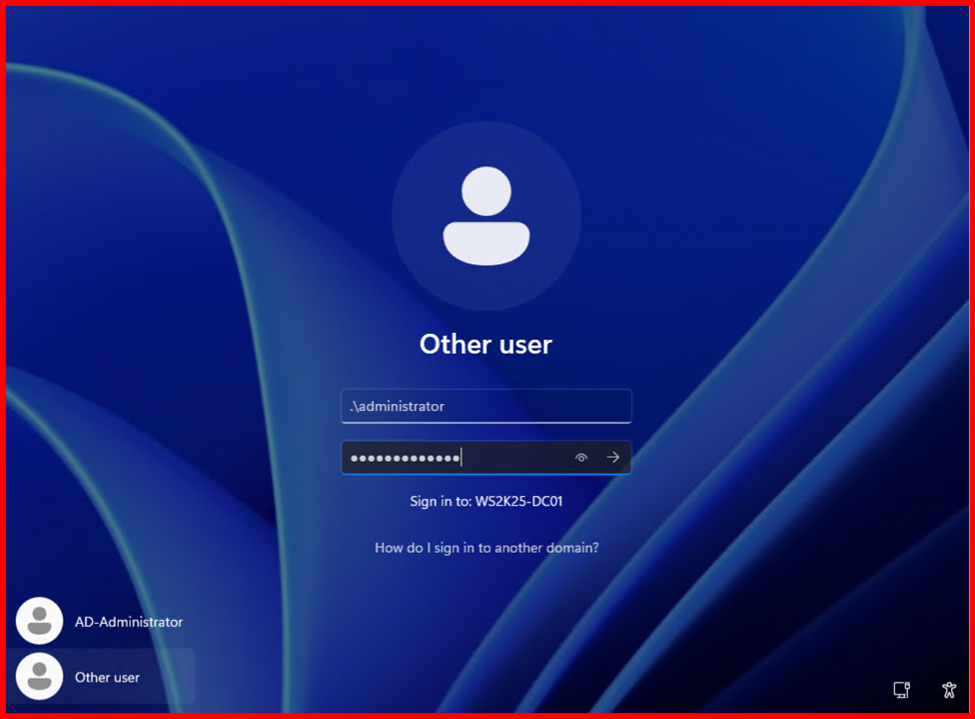
2. Log in with DSRM credentials (set during domain controller setup)
🧠 It is not domain login, it’s local-only.

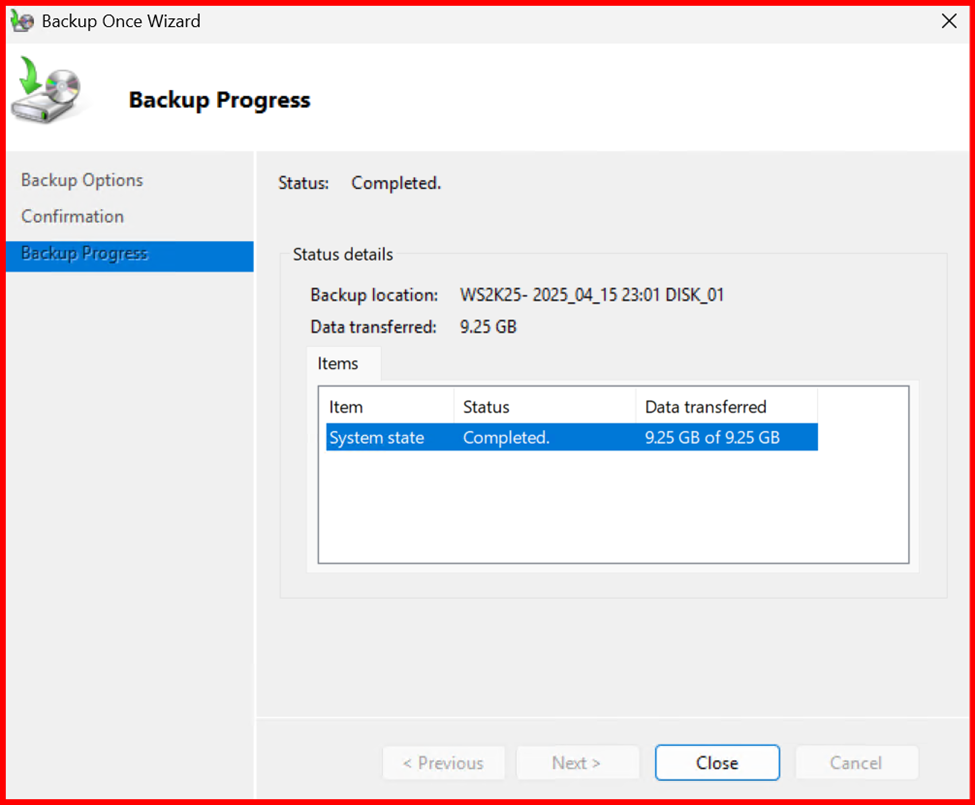
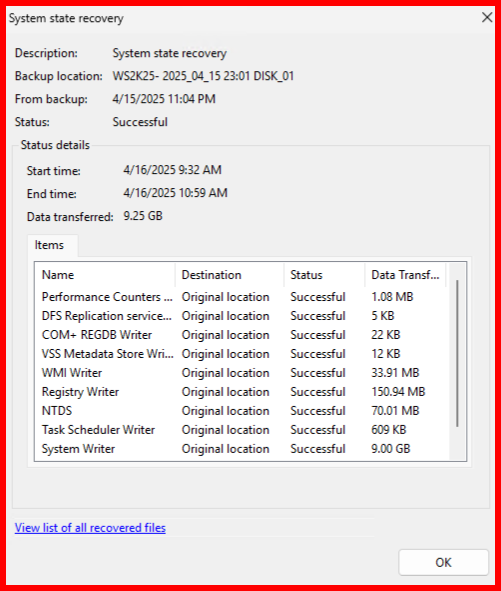
3. Restore Using Windows Server Backup
Option1: Perform using Windows Server Backup (GUI)
- Select Recover > This server > System State
- Follow the wizard and restart once done
Option2: Perform the System State Restore
Open Command Prompt as Administrator and run:
📦 Step 1: List Available Backups
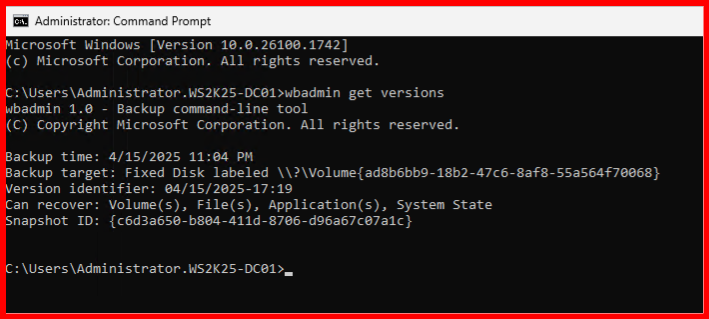
Copy the version you want to restore.
04/15/2025-17:19
💻 Step 2: Start the Restore
WBADMIN START SYSTEMSTATERECOVERY -version:04/15/2025-17:19 -quiet
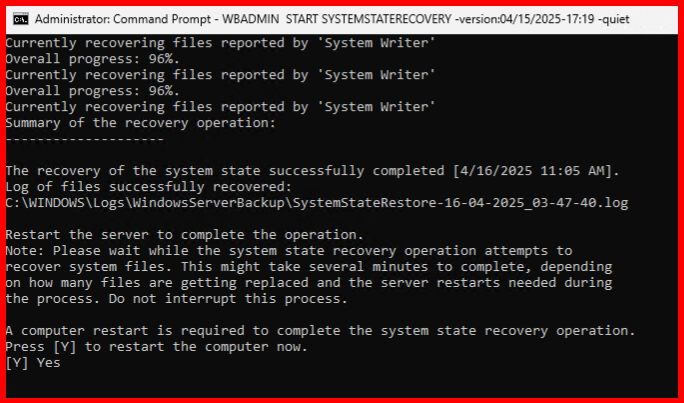
🔁 Step 3: Reboot When Prompted
After the restore completes, you will need to reboot.
Note: It almost take approx. 2 hours to restore.
🔄 Step 4: Reboot and Exit DSRM Mode
Once restoration is complete:

Disable Safe Mode:
bcdedit /deletevalue safeboot
shutdown /r /t 0
Server will reboot normally, and Active Directory will load.
💡 DSRM is like safe mode for Domain Controllers.
✅ Best Practices I Follow
- Backup AD at least daily
- Store backups on a separate disk or network share
- Regularly test your restore procedures
- Document your DSRM password securely
🧠 Final Thoughts
Backing up Active Directory might seem intimidating at first, but once I learned the basics, it became routine. Regular backups and a clear recovery plan give me peace of mind—and can save hours (or days) of downtime in an emergency.
If you’re just starting out, take it one step at a time. The more you practice, the more confident you’ll become with AD backup and recovery.
Leave a Reply